6.13.2012

life...

...is a little bit crazy right now.

Things are not going exactly as planned or expected with this pregnancy.

(That's what I get for getting comfortable and thinking I knew what to expect the 3rd time around, right?)

Right now there is not much more to say than that, because we don't know much more than that, but life is a little stressful around here to say the least. 

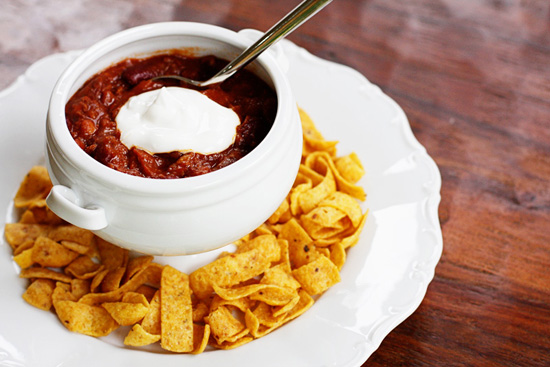
Just ask Andrew...  I'm pretty sure I haven't cooked him dinner in well over a week (and no, heating up store-bought gyoza last night probably doesn't count!) and he has made two big pots of chili in less than 2 weeks and will be making more for Father's Day!

(Yep.  He's basically cooking his own Father's Day meal.  Granted it will be made ahead of time and reheated - the joys of chili! - but still...  I feel bad.)

I haven't slept much at all the last few weeks.  Combining regular pregnancy-insomnia with a huge dose of the unknown & unexpected makes sleep practically impossible.

Today has more Dr. stuff in store, and loads and loads of laundry that have been ignored for far too long (hoping I don't run out of laundry soap, since I haven't made any in quite a while!).

I guess the point of all this rambling is that there hasn't been much going on in the kitchen lately (except dishes) and I'm not exactly sure when that will pick back up.  Although it won't be too long, since I am having complete kitchen-withdrawals already!

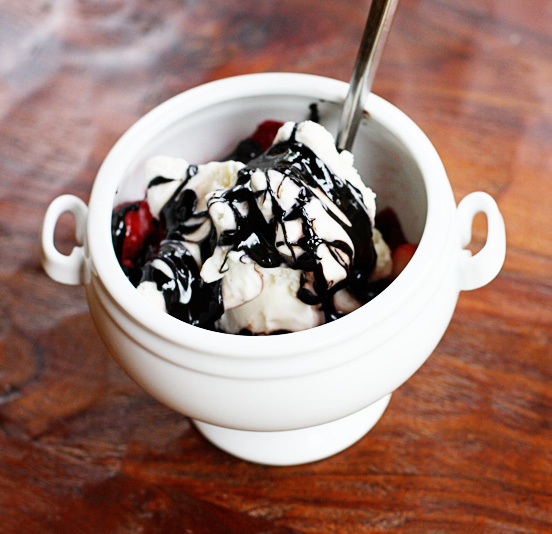
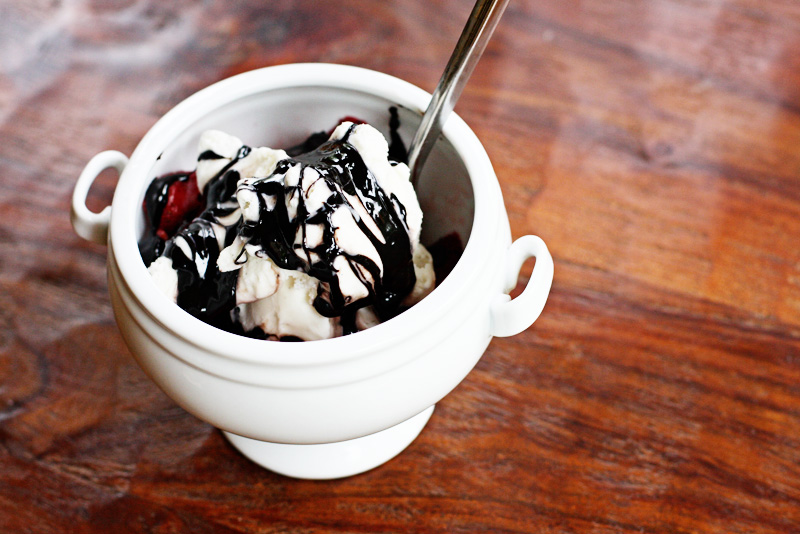
I will definitely be doing some Father's Day desserts...  as soon as I figure out what I want to do and can handle doing in my sleep-deprived state.

All this to say...  Thank you all for being so patient with me!


6.12.2012

easy, homemade man chili

I kind of hate to admit this, but there are just some things that my husband does better than me in the kitchen.

And I have to say it, chili is definitely a win for him!


Maybe it's because he has just eaten a lot more chili in his life, but I can never quite seem to keep mine from being too...  different.

I can't leave well enough alone, and in many cases that's ok, but for a good, classic man-chili, simple is better!

Andrew made a huge pot of this last week and we finished it off in a matter of days.

And last night, we (and by we, I mean my pregnant chili-craving self) decided he should make another big pot!

You could definitely cut this recipe in half if you don't want a large amount, but this is a great dish to feed your freezer with for future meals... so why not get out the big pot and have another meal waiting for you?

Oh, and the spice measurements?  Totally subjective.  We like things spicy around here, so we use quite a bit.  If you're making this for the first time, or you're just not sure, start small and you can always add more later!

Andrew's Easy Homemade Man-Chili Recipe

Ingredients:
2 pounds ground beef
1 large onion, chopped
8 cups (or 4-15oz cans or 2-28oz cans) tomato sauce
8 cups (or 4-15oz cans) beans (we like 2 kidney, 1 pinto and 1 black or garbanzo!)
1/4 cup chili seasoning (your favorite brand, or homemade)
salt & pepper, to taste
chipotle or cayenne pepper, to taste
chopped fresh or canned jalapeño peppers, to taste

Directions:
In a large dutch oven or stockpot, brown the beef: breaking it apart into large chunks and cooking until there is no more pink.  (You don't want to break up the meat into tiny bits, thick chunks the size of your thumb or a bit larger at the smallest!)  As the meat cooks and browns, season it with salt & pepper and about half of the chili seasoning blend.

Here's the trick for the onions:  Add them a little bit at a time, starting with when you brown the meat, and saving a little bit for the very end, so that there are different textures of onions all throughout the chili.  Some bits will be very soft and sweet and others will have a little more bite to them!

(If your meat is on the fattier side, drain off some of the excess fat before continuing.)

Once the meat is cooked through, stir in the rest of the ingredients.  Bring everything to a boil and then cover and simmer on low as long as you'd like!  (Chili only tastes better the longer it simmers, so this is a perfect meal to make a day or two before and reheat in the slow cooker!)

Serve hot with shredded cheese, sour cream and corn chips if you're like me...  or eat it plain if you're a purist like my husband!  :o)

Enjoy!


6.08.2012

rhubarb crumble bars, redone... a bigger batch!

I was supposed to be packing yesterday for this weekend, but I just couldn't get away from this overpowering urge to bake something.

Specifically something rhubarb.


You see, I had made a big batch of rhubarb sauce earlier this week and I didn't want to freeze it...  I wanted to enjoy it now!

These crumble bars are absolutely amazing.  I just can't emphasize that enough.

Even thinking about making them gets me drooling...  and the smell while they are baking?

Heavenly!

So, I did what any sane baker would do...  I ignored the packing, made the boys and I a big batch of popcorn and got to work on these bars!


Give these bars a try next time you want to spoil your family and friends with an amazing rhubarb treat!

Rhubarb Crumble Bars Recipe
adapted from The Pioneer Woman

Ingredients:
3 cups flour
2 cups firmly packed brown sugar
3 cups old-fashioned rolled oats
2 teaspoons baking powder
1 teaspoon salt
1 teaspoon cardamom
1/2 teaspoon nutmeg
2 cups butter, room temperature
2-3 cups rhubarb sauce

Directions:
Preheat the oven to 350ºF. Line a 9x13" baking dish with foil or parchment paper and then butter the foil.

In your mixer bowl, place the first 7 ingredients (everything except for the butter and sauce) and mix until combined. Add in the butter and mix until everything is moist, crumbly and combined.

Dump about two-thirds of the mixture (no need to measure, just guesstimate!) into your prepared pan and press firmly. Spread the rhubarb sauce evenly over the crust.

Take the remaining crust mixture and crumble it evenly over the top.  Press down very gently.

Bake for 60-75 minutes, until the crust is golden brown.  Let the bars cool completely in the pan and then lift out by the foil and cut into bars to serve.

These freeze amazingly, so don't be scared to make this big batch!  :o)  (But if you'd prefer a smaller batch, click here for my original smaller recipe!)


6.07.2012

triple citrus margaritas, from scratch

Two drinks in a row?  Yep.  This is me wishful-thinking and the husband enjoying!

(30 weeks pregnant, I am obviously not drinking these days!)  :o)


For some reason Andrew got it into his head the other day that he wanted to make margaritas from scratch.  No mix, no cheating...  just real juice!

I love it when he gets in those moods and into the kitchen with me.  We have fun together (and annoy each other!) and definitely enjoy the results!!

These margaritas turned out great!  (Well, according to everyone who tried them and my own pre-tequila sips!)

They are just as good with just lemon & lime juice if you don't have or want orange juice, but we loved the combo of all three!

If you've never made simple syrup before, it's an incredibly easy thing to make and great to keep on hand in your fridge.  Perfect for sweetening iced tea, iced coffee, fresh squeezed lemonade and more.

Give these a try next time you are craving a great margarita and just don't feel like driving to the nearest mexican restaurant!  (Where I'm betting you won't get anything close to this good!)


Thanks for joining me in the kitchen honey!

Triple Citrus Margaritas, from scratch Recipe
makes enough for 4-6 servings

Ingredients:
1 cup fresh squeezed lemon juice
1 cup fresh squeezed lime juice
1 cup fresh squeezed orange juice
1 cup simple syrup*
Triple Sec
Tequila

Directions:
*Make the simple syrup (recipe below) and let it cool.

In a pitcher, mix together the lemon, lime and orange juices with the simple syrup (you can start with 1/2 cup and add more to taste if you're not sure how sweet you'd like things!).

For each margarita, fill a large glass with ice.  Pour in a good splash of Triple Sec, a shot or two of tequila and then fill with the margarita mix!

(You can also just mix up one big pitcher, to taste, and serve from there.  Whatever you'd like!)

-----

Simple Syrup Recipe

Ingredients:
1 cup sugar
1 cup water

Directions:
Place the sugar and water in a small saucepan.  Heat over medium heat, stirring occasionally, until the sugar is melted and the syrup is clear.

Remove from the heat and let cool.  Store in a jar the fridge for up to several weeks!


6.06.2012

perfect fresh blended piña coladas

I was having a frustrating day the other day (ok, when is that ever not the case these days?!), and I really needed something special to cheer myself up.

I have always loved a good piña colada...  and I just so happened to have a beautiful pineapple sitting on my counter and some cream of coconut in my fridge that day!

The combination of the fresh, sweet pineapple, creamy coconut, a touch of ice cream and lots of cold ice made this an amazingly refreshing and special treat.


I have to say... I think this may have been the best piña colada I have ever had!

(Of course I was really wishing mine had a little rum in it, but it was pretty amazing even without it, so I'm not complaining!)

Perfect Fresh Blended Piña Coladas Recipe
makes 1-2 servings  :o)

Ingredients:
1/4 of a fresh pineapple, peeled, cored and chunked
1/4 cup cream of coconut
2 scoops vanilla ice cream
2-3 handfuls of ice
2oz light rum or coconut rum (leave this out for virgin drinks!)

Directions:
Blend the pineapple in your blender until smooth.  Add in the rest of the ingredients and blend until smooth.

Taste and add more cream of coconut, ice or rum to your liking.

Enjoy responsibly and pretend it's summer already...  even if you live in the dreary northwest!  ;o)


6.05.2012

stepping out of my comfort zone...

I don't know how many of you know this about me, but I am painfully shy.

Put me in a room full of people and I will most likely find a cozy corner, people watch and keep to myself unless someone comes and starts a conversation with me.

And sometimes even that makes my heart race!

That's not to say I don't love those conversations when they happen, because I do, but getting there is so awkward and difficult for me.

I told you... painful!

I don't like this trait that I have, and I always try to convince myself that it's not true.  Before I walk into a room I tell myself that I will be outgoing and talkative!

And then I get two feet farther into the room and my shell closes right back up and I find my non-threatening corner and observe.

It's pathetic really.  I just can't seem to shake this personality trait and it drives me nuts.

Seriously...  I even find myself running dialogue in my head of what I would say, or would have said, if I could.  But I usually can't!

Fortunately for me, I married a man who is my polar-opposite in this area.  He is incredibly outgoing, carefree, loud, and boisterous!

He makes up for all my quiet shortcomings, although in many ways I'm sure his outgoing personality actually helps me hide behind my introversion.

I don't really have to step out of my comfort zone when he's around, and I like that...  but it definitely doesn't push me to work harder!

So, this weekend I am stepping completely out of my comfort zone.  And I'm not even taking my husband/safety net!

I am going to a food bloggers conference in Seattle (BlogHer Food '12) and at this point, I don't know one person who is going.  Craziness isn't it?!

My husband is actually the one who encouraged me to sign up when they first announced the conference, especially since it is so close to home this time.  And I am glad he did...

But boy am I nervous!  :o)

Although, I think the excitement of two full days kid-free (well, except for the tiny one in my belly who will be tagging along!) is outweighing the nerves quite a bit.  I am so excited for this little burst of me-time!

And hopefully I will come home from this boundary-pushing weekend with a bit more boldness... and some new friends!

(Oh, and if you happen to be going to BlogHer Food...  come say Hi to me and help me push out of my comfort zone!  :o)  I'll be the fidgety, very pregnant one sitting near the back somewhere with a shy smile and frequent bathroom-breaks!)


6.04.2012

homemade hot fudge sauce...

Hot fudge sundaes.

Coffee ice cream drowned in homemade hot fudge.

Strawberries dipped in warm, gooey fudge.

Spoons and finger-fulls of fudge liked clean, over and over again...

Am I making you hungry yet?


My friend Cory (over at Fresh is the Taste!) makes some amazing Hot Fudge Sauce and she gave a bunch out as gifts last Christmas.

We were lucky enough to get a jar, and I am a tiny bit embarrassed to say I didn't share one drop of it.  I ate it all myself.  Mostly on my Häagen Daaz coffee ice cream...

I can't believe it took me 6 months to make some myself!  (Or maybe I can, because I have no self-control with the stuff!)

I made a few changes to Cory's recipe, but both versions are absolutely delicious!  Check her original version out here.

Oh, and one of the best parts of this recipe??  It only takes about 15 minutes from start to finish!  Perfect for a last-minute special dessert!  (Because who doesn't love a scoop of ice cream with great hot fudge on it?!)


Homemade Hot Fudge Sauce Recipe
adapted from Fresh is the Taste
makes about 2 cups

Ingredients:
1/4 cup butter
1/4 cup coconut oil
1 cup sugar
1/2 cup dutch-processed cocoa powder
1/2 cup evaporated milk
1 teaspoon pure vanilla extract

Directions:
Melt the butter, coconut oil and sugar together in a saucepan over medium heat until all combined and smooth, stirring often.  Whisk in the cocoa powder and evaporated milk and bring to a boil.

Once boiling, remove from the heat and stir in the vanilla.  The fudge will thicken as it cools.

Store in the fridge and reheat carefully to serve!

(This supposedly lasts up to a month in the fridge, but I've never had it around longer than a week to test that theory!)


6.01.2012

sirloin steak & veggie kabobs, gluten free

I know this is kind of a cheater recipe, but it's one that I want to share because it is so easy and simply delicious, for everyone...  gluten-free-eaters or not!


Allegro marinades are one of the few kinds of gluten-free marinades I can find easily at my small-town grocery store.  I'm guessing if I can find it in mine, you can find it in yours!


I loved the flavor, and the simplicity of dumping out a bottle is wonderful!

Yes, throwing together a marinade from-scratch can be easy enough in itself, but sometimes I just don't want to have to think about if onemorething is gluten free or not, when my brain is just tired.  :o)


Disclaimer:  This post is not an 'official' review. Allegro doesn't know anything about me, I just found their product, loved it and wanted to share it with you!

Gluten Free Sirloin Steak & Veggie Kabobs Recipe

Ingredients:
3 pounds beef sirloin steaks
2 large onions
2 large bell peppers
1 bottle Allegro Original Marinade
metal or wooden skewers (if wooden, soak for at last 30 minutes before using!)

Directions:
Cut the steaks into about 2" cubes, trimming off any excess fat as you go.  Place all the cubes into a gallon-sized ziploc bag and pour in the whole bottle of Allegro gf marinade.

Marinate at least 30 minutes at room temperature, or up to a day in the fridge.  Remove the meat from the fridge at least 30 minutes before grilling if it has been chilled.

Cut the onions into quarters, and trim the bell peppers and cut them into about 2" pieces.  You can also add mushrooms and other veggies here...  whatever you like on your skewers!

Thread the meat and veggies alternately onto the skewers, beginning and ending with the meat.  When they are all ready, grill them on a fairly hot grill with the lid closed until the meat is cooked to your liking and the veggies are tender.

Serve with rice!