almond berry crumble, gluten free

…with no special gf-flours and you absolutely do not need to be eating gluten-free to love this dessert!

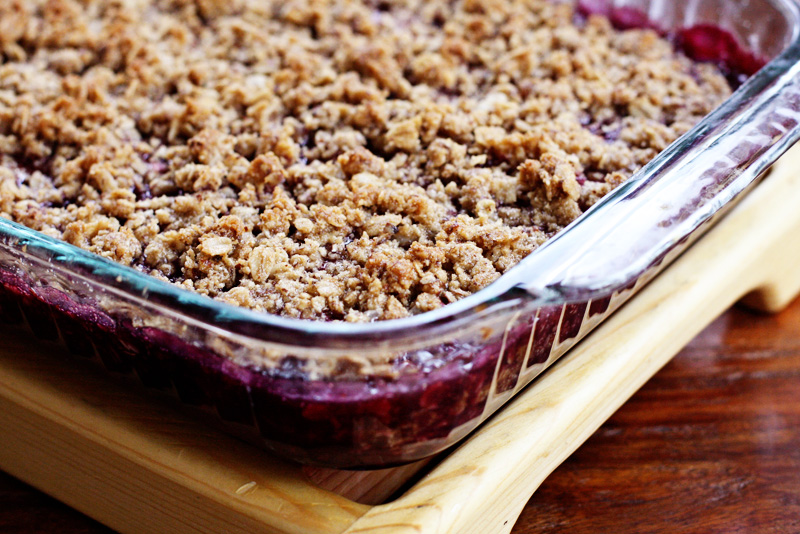
I was craving a berry crisp the other day and of course I wanted to make something that Bjørn would be able to enjoy too, so I decided to play around and see what I could come up with!

I thought about using an all-purpose GF flour mix, but I decided to go with ground almonds because I just love the flavor and texture they give… especially to such a simple dessert.

And it turns out I actually think this might be my new favorite crumble or crisp topping all together… regardless of gluten-free intentions!

Gluten Free Almond Berry Crumble Recipe

Ingredients:
for the filling:
8 cups mixed berries (any)
3 tablespoons cornstarch
3/4 cup sugar
for the topping:
1 1/2 cups finely ground almonds* (almond meal or almond flour)
2 cups firmly packed brown sugar
1 teaspoon salt
1 teaspoon cinnamon
1 teaspoon nutmeg
1/2 teaspoon cardamom
2 cups GF old-fashioned rolled oats (can use regular if not serving this to gf-eaters!)
1 cup butter, softened

Directions:
Preheat the oven to 350ºF. Butter a 9×13″ baking dish.

In a large bowl, toss together the berries (if frozen, don’t thaw!), cornstarch and sugar. Dump this mixture into the baking dish.

If you’re worried about leaks/bubbling over at all, place the baking dish on a foil-lined baking dish before baking, just in case!

In another large bowl, stir together all the topping ingredients except the butter. Dump in the butter and mix well until moistened and crumbly (Use your hands! The best kitchen tools you have!).

Crumble this mixture all over the berries in the pan and bake for 60-70 minutes, until the topping is golden and filling is bubbling.

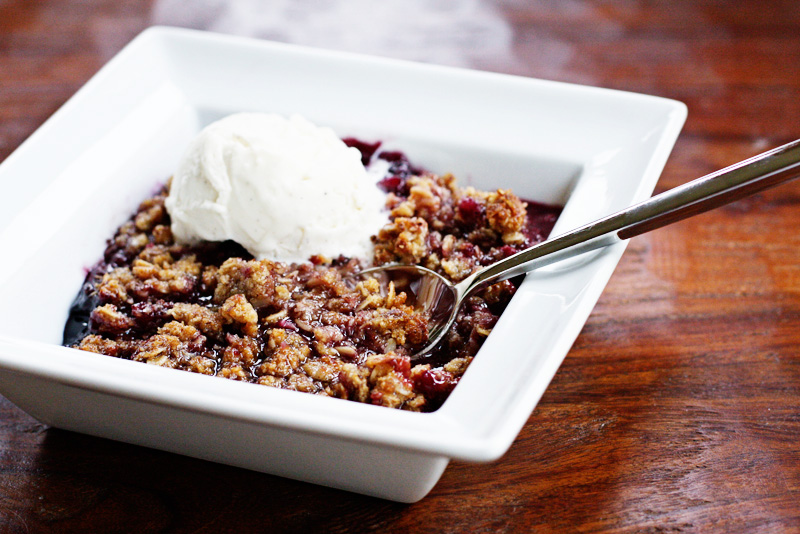
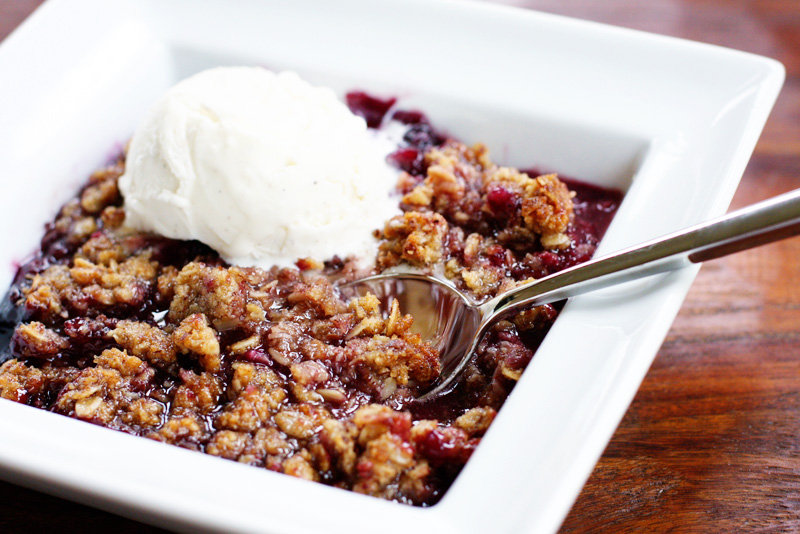
Let sit a few minutes before serving and then serve warm with ice cream (Breyer’s Vanilla is Gluten Free!) or lots of fresh whipped cream!

*I buy my ground almonds (almond meal) at Trader Joe’s but you can also just grind up some almonds in your food processor or blender until finely ground… or substitute almond flour if that’s what you have!

sesame orange meatballs

I am a huge asian-food fan. I have loved pretty much everything I have ever tasted, and orange chicken is no exception!

I wanted to make meatballs for dinner the other day but I wasn’t in the mood for my usual meatballs and gravy, and kept coming up short on new ideas…

My sweet friend Charisa and I were sitting at the kitchen counter trying to decide what direction to take them when we found a bottle of Panda Express Orange Sauce that I had bought at Costco a while ago, and these delicious little bites where born!

These sweet, savory, asian meatballs would also be great made with ground turkey or chicken!

Sesame Orange Meatballs Recipe
serves 4-6

Ingredients:
2 pounds ground beef
1 large egg
1/4 cup prepared orange sauce*
2 tablespoons flour
2 tablespoons minced dried onion
1 teaspoon garlic powder
salt & pepper, to taste
1/2 teaspoon sesame oil
1/2 teaspoon ground or freshly grated ginger
*more orange sauce to heat and serve the meatballs with

Directions:
Preheat the oven to 425ºF. Line a rimmed baking sheet with foil and set aside.

In a large bowl, gently and quickly mix together all of the meatball ingredients with your hands.

Form the mixture into golf-ball-sized balls and place them on the baking sheet. (The easiest way to do this is with clean hands dipped in cold water in between formings!)

Bake for 35-45 minutes, until the meatballs are golden and no longer pink in the center when you cut one in half.

***This is the place to stop if you are making these ahead of time or to stock your freezer. Cool the meatballs completely and then place them in a single layer in freezer-safe Ziploc bags and freeze for up to 3 months!***

When you are ready to serve them, heat the meatballs covered in more of the orange sauce in a dish in a 350ºF oven or in a saucepan over medium heat until heated through.

Serve with rice and your favorite veggies!

baked quinoa mac & cheese

For some reason, I always seem to forget about quinoa. And then I am pleasantly surprised every time I remember to make something with it again.

This quinoa ‘mac’ & cheese was such a delicious treat!

I saw the idea and knew that it was something my mac & cheese loving family had to try right away… And I’m so glad we did!

It was a hit with everyone except picky 3 year old Bjørn, who I’m sure just wouldn’t eat it because he saw me make it (He doesn’t like to know what’s in his food!).

This dish has all the rich, gooey flavor of your favorite mac & cheese with a whole lot less guilt in a healthy, protein-packed punch.

If you’ve never tried quinoa before, because you’re not sure how you’d like it… this recipe would be a great place to start and give it a try!

Baked Quinoa ‘Mac’ & Cheese Recipe
adapted from Monica Nelson Fitness
serves 4-6, and can be easily doubled into a 9×13″ pan!

Ingredients:
1 tablespoon olive oil
1-2 cloves garlic, minced
3/4 cup quinoa, rinsed well and drained
1 1/2 cups chicken stock
salt & pepper
1/2 teaspoon onion powder
1 large egg
3/4 cup milk
2 cups shredded cheese (cheddar & pepper jack are great!)
1 cup shredded cheese, for topping

Directions:
Heat the oil in a medium skillet. Sauté the garlic for a few seconds and then add in and sauté the quinoa for about 5 minutes, stirring occasionally.

Add in the chicken stock, salt & pepper, and onion powder, stirring well. Bring to a boil, then reduce the heat to low, cover tightly and simmer for 15-20 minutes, until most of the liquid has been absorbed.

While the quinoa is cooking, preheat the oven to 350ºF and lightly grease an 8″ or 9″ square baking dish.

When the quinoa is done, let it sit off the heat for about 5 minutes while you whisk together the egg and milk in a small bowl. Quickly stir the liquid into the pan of quinoa with the 2 cups of cheese and dump it all into the prepared baking dish.

Sprinkle the remaining cheese over the top and place in the oven to bake for 25-35 minutes, until the cheese is bubbly and golden brown!

gluten free cinnamon chex bars

I was so excited when I found out that Kraft Jet-Puffed marshmallows are gluten free!

(It’s the little things, right??)

Marshmallows are one of Bjørn’s favorite treats ever (oddly enough he has always called them “booah’s”, which is the same name Haakon has for his beloved blankie!).

The rest of us love rice krispies treats, so I knew they would be an essential part of our gluten-free happiness around here!

Chex cereals are all (except Wheat and Bran, of course!) gluten free and the cinnamon flavor is so good (I think it tastes like cinnamon toast crunch, only crispier and better!)… so they were the obvious solution to our Rice Krispies dilemna.

(Yes, I know that they make Gluten Free Rice Krispies, but I have yet to see them in any of our stores and I look all the time!)

I can’t wait to try this with all the different Chex flavors (chocoalte anyone??) and someday with the GF Rice Krispies if I can ever find them!

Now, obviously these are just as great for gluten-eaters… They don’t have any tricky ingredients and they taste amazing no matter what your reasons for making them.

I just love that they are gluten free for my gf-for-now boy! :o)

Gluten Free Cinnamon Chex Bars Recipe

Ingredients:
2 tablespoons butter
20 large Kraft Jet-Puffed marshmallows
4 cups Cinnamon Chex cereal (or any gf Chex flavor!)

Directions:
Butter an 8” or 9” square pan.

Melt the butter in a medium pot over medium heat. Stir in the marshmallows to coat and cook, stirring often, until melted and smooth.

Remove from the heat and stir in the cereal until well coated.

Press the mixture gently into the greased pan. (Get your hands damp with cold water to keep the bars from sticking as you press them down!).

Let them cool for a few minutes before cutting. Store in an airtight container for best results!

(This recipe can easily be doubled… Tip: 40 large marshmallows equals one 10oz bag!… I just find that we will eat however many of these I make, so I try to help us all out ahead of time unless we are having company!)

spicy pesto chicken with wilted fresh baby spinach

This meal was a delicious surprise born out of necessity.

I need to eat more greens and protein for this baby and I have been having a hard time doing that. Nothing sounds or tastes good.

Until this, that is!

I made my homemade pesto sauce, but loaded it up with crushed red pepper flakes because I love a kick.

Then I warmed some of it up on the stove with some grilled chicken breast and tossed in a ton of fresh baby spinach until it was all coated and jut barely wilted with the warm pesto sauce.

I was so worried that all would be able to think about was the noodles that I was wishing were on my plate with this, but I didn’t miss them at all! In fact, I made it again the next day and ate it twice!!

Try this sometime if you need a good protein/greens meal and are getting tired of cold salads like I am! :o)

Spicy Pesto Chicken with Wilted Fresh Baby Spinach Recipe
serves 2

Ingredients:
1/4 cup or so homemade spicy pesto sauce*
1 chicken breast, grilled or sautéed and sliced
3-4 large handfuls fresh baby spinach

Directions:
In a large pan over medium heat, warm the pesto sauce and chicken together. Once they are both nice and warm, toss in the spinach, turning and stirring often until coated with the pesto sauce and just as wilted as you like (I prefer mine barely warmed, and not too soft!)

—-

*Spicy Pesto Sauce Recipe

Ingredients:
2 cups packed fresh basil leaves
1/4 cup toasted pine nuts
1 garlic clove
1 teaspoon red pepper flakes, to taste
1/2 cup (or so) extra virgin olive oil
salt & pepper, to taste
1/2 cup fresh grated parmesan cheese

Directions:
In your food processor, place the basil, toasted pine nuts, garlic, and red pepper flakes. Pulse until everything is finely chopped.

Turn the food processor on and slowly stream in the olive oil until you have a smooth, creamy consistency.
Store any leftover in a small jar in the fridge with a thin layer of olive oil poured on top.

Or you can freeze leftover pesto to use later!