lessons learned this weekend…

* toddler transition to a ‘big boy bed’ is not exactly going to be fun.

* entertaining large groups of people without a working dishwasher is not easy.

* “date night” can mean two very different things to two different people.

* 2 year olds who rarely eat meat might just be holding out for a good t-bone steak.

* some babies will skip right over the puréed food stage and go right to chunks.

* it’s much easier to accumulate stuff than it is to get rid of it.

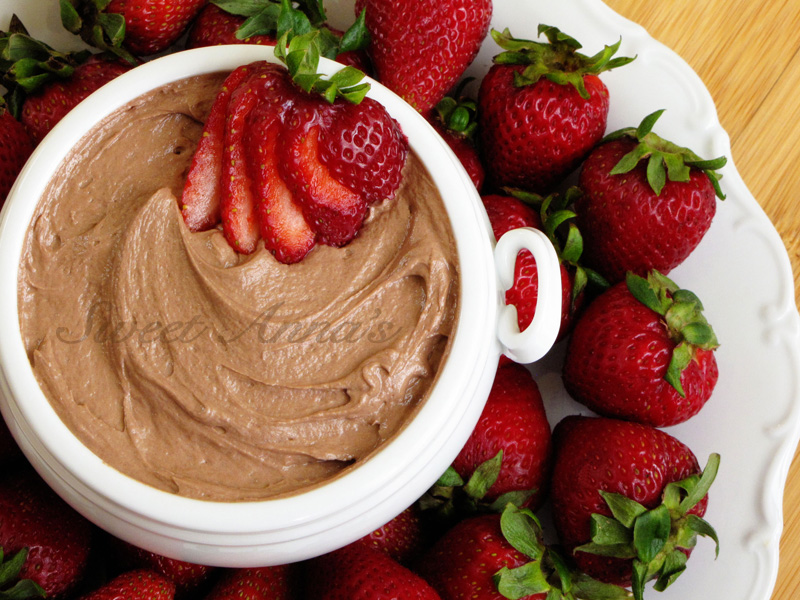
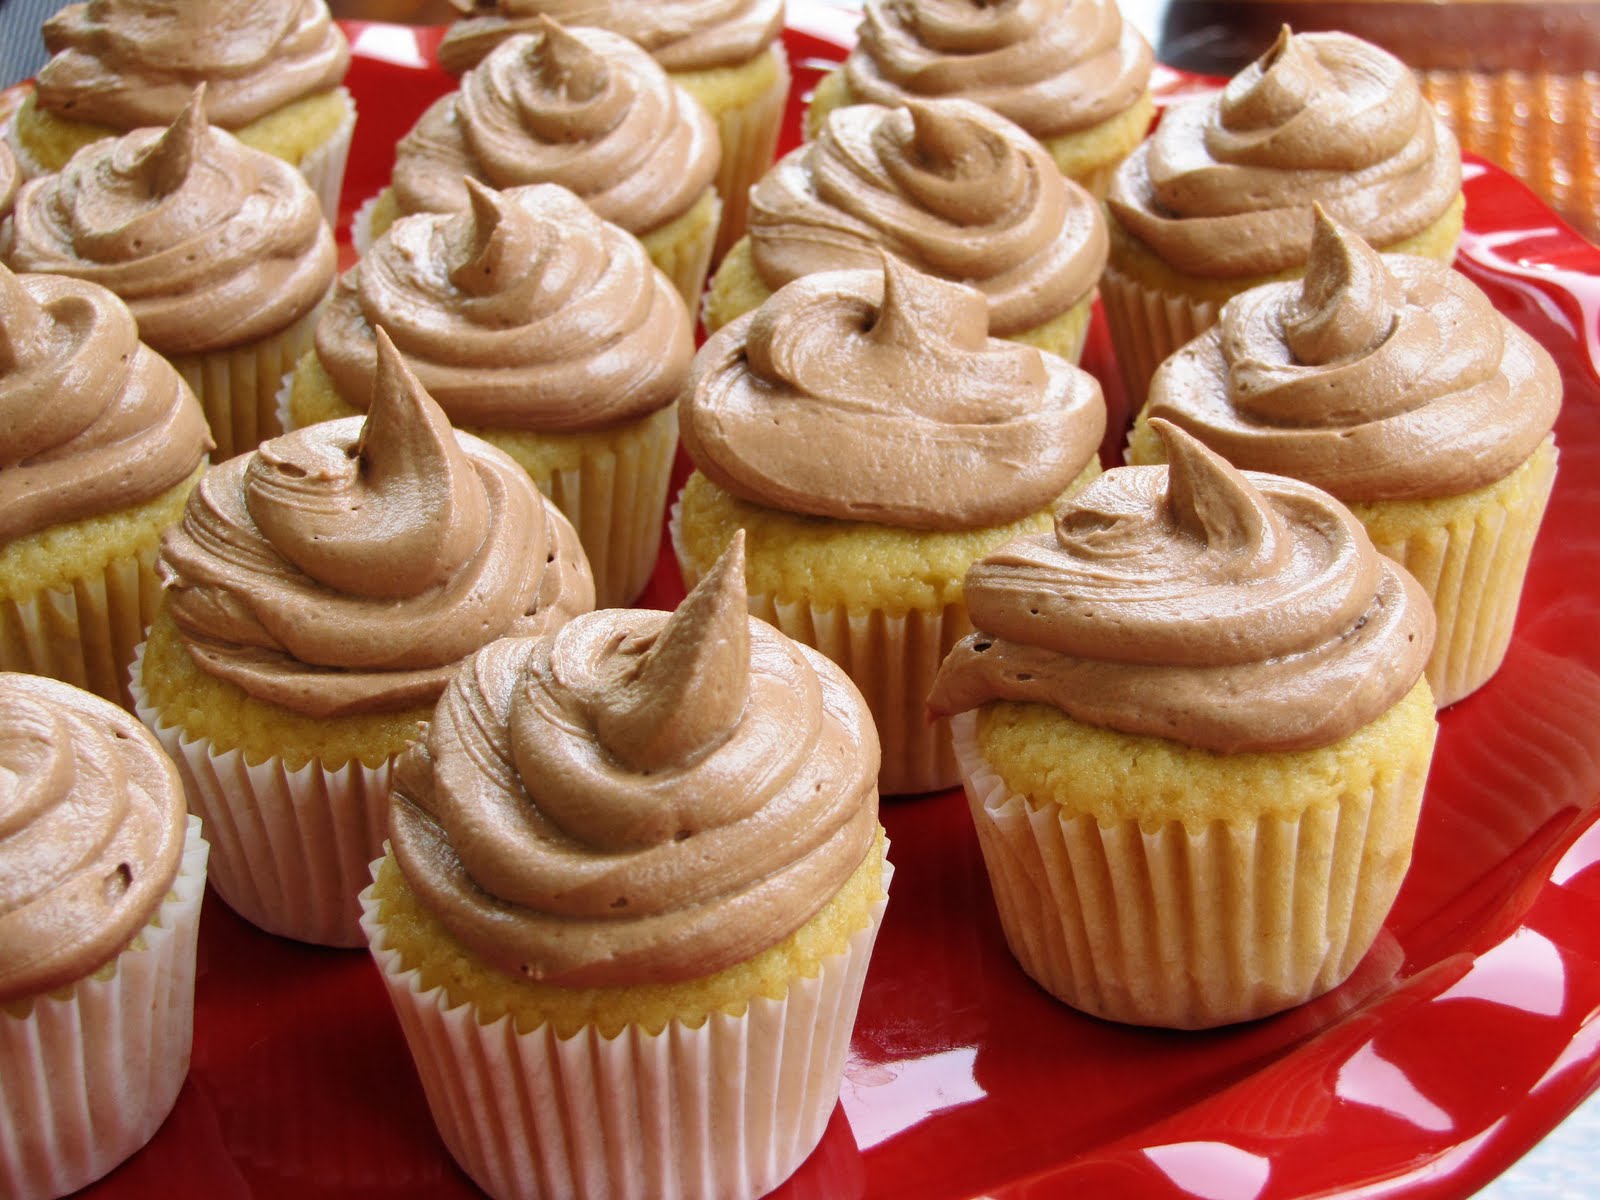
* and… nutella tastes even better when it’s whipped into a frosting** with lots of butter and sugar!!

(**recipe to come… as soon as I get 2 minutes to post it!!)

nutella buttercream frosting

I just don’t even have enough words for this frosting. It is better than I could have ever imagined.

But really, Nutella + Butter + Sugar + Cream… how can you go wrong?!

I stumbled upon a version of this recipe over at My Baking Addiction, and I just knew I had to try it.

I served this on vanilla cupcakes and in a bowl to dip strawberries in… I could easily just sit and eat this by the spoonful, it’s so good!!

Simple Nutella Buttercream Frosting Recipe

Ingredients:
1 cup butter, softened
1 1/2 cups nutella
2 pounds powdered sugar
2 teaspoons pure vanilla extract
1/2-3/4 cup heavy cream or milk

Directions:
In your large mixer bowl, beat together the butter and nutella until well combined. Slowly add in the sugar and mix until combined.

Add in the vanilla & 1/4 cup of the cream, beating until well mixed. Add more cream, a bit at a time, until you reach your desired consistency. Continue to beat until light and fluffy!

This frosting can be made 2-3 days in advance! Let the frosting sit at room temperature until soft again, and if needed - re-whip until fluffy!


cradle cap cure…

finally!!!

Two babies and two disgusting cases of cradle cap later…

I have found a solution*!

(*Disclaimer: this is what I have found to work, for us! I am not a doctor, or expert of any kind, and I’m not pretending to be. I’m just sharing what worked for me.) :o)

Ok, so here it is:

I used this Delish Natural’sYum Bum Butter“, a natural baby balm made with organic coconut oil, shea butter & cocoa butter, that I got in a Baby Bundle from Bundles and Buzz.

This stuff is amazing… I use it for diaper rash, chapped cheeks and nose, dry skin patches… and I am always amazed at how fast this stuff seems to improve the situation!

Anyways, I took a generous amount (a tablespoon or so!) of the yum bum butter and slathered it all over the cradle cap area on Haakon’s scalp before bed.

I left it to soak in for almost a full 24 hours, until the next evening’s bedtime routine.

I then took a very fine-toothed comb and gently combed off all of the now-saturated flakes (yes, it was a very gross process… I’m just so glad it’s not on his head anymore!!).

It took a little while, but Haakon didn’t mind. In fact I’m pretty sure he hardly noticed what I was doing. He was pretty intrigued with his toys and watching his big brother take a bath! :o)

When I finally got out all of the flakes I gave him a bath and gently shampooed his head to get out the last of the flakes and oil.

And… voilá! No more gross, disgusting, scaly, ugly scalp!!! YAY!!!!

(What?! You’re not as excited as I am? Well… you would be if you had seen how his scalp looked before I did this!)

(Oh, and feel free to thank me for not posting pictures of said disgusting scalp on here. Google it, if you’re that curious!) :o)

The process may need to be repeated a few times to get rid of everything, but it should work!!

You’re welcome!

greek egg, lemon, chicken & rice soup (avgolémono)

Ok, so I’m not going to say this is actually a greek recipe, since I’m not greek and this soup is just my version of this recipe from Tasty Kitchen… but I will say that it’s refreshing, different and good!

I love the somewhat unexpected combination of flavors and textures… so creamy and rich, yet at the same time fresh and bright from the lemon juice and basil.

Try this out next time you’re looking for something different… You won’t be disappointed!

Greek Egg, Lemon, Chicken & Rice Soup Recipe (Avgolémono)

Ingredients:
8 cups chicken stock
1/4 cup fresh-squeezed lemon juice
1 chunk parmesan rind**
1/2 teaspoon fresh ground black pepper
1/2 cup butter, divided (1/4 cup + 1/4 cup)
1/2 large onion, finely chopped
1/2 cup flour
6 egg yolks
1/2 cup heavy cream
2 cups cooked rice
2 cups cooked chicken
1/2-1 teaspoon crushed red pepper flakes
2-3 tablespoons fresh (or freeze-dried) chopped basil

Directions:
In a large stockpot, bring the stock, lemon juice & pepper to a boil; reduce heat to low and simmer for at least 20 minutes.

Meanwhile, in a medium saucepan sauté the onions in 1/4 cup of the butter over medium heat until translucent; Dump into the simmering stockpot.

In the same saucepan, melt the remaining 1/4 cup butter and slowly whisk in the flour, stirring and cooking for 10 minutes or so… until toasty-smelling, smooth and light golden brown. (That would be making a roux!). Stir the roux slowly into the simmering stock, whisking constantly, and continue to simmer for 5-10 minutes until the soup has started to thicken.

In a medium bowl, whisk the egg yolks until light and fluffy. Whisk in the cream until combined. Take about 2 cups of the hot soup out of the pot and very slowly whisk it into the bowl with the eggs and cream in it, bringing the egg mixture up to the temperature of the soup. (That would be tempering!) Pour the tempered egg mixture back into the soup pot, stirring well to combine.

Remove the parmesan rind and discard. Stir in the crushed red pepper flakes and basil and taste to see if more salt & pepper are needed.

Serve with lots of fresh bread & butter and enjoy!

**If you don’t save the rinds from your parmesan cheese, please start doing so! Just keep a ziploc bag in the freezer and toss them in whenever you are finished with a hunk of parmesan. They add such an amazing layer of depth (some may call it “umami”) to soups… Trust me on this one!!

perfect chocolate chip cookies

So, you put a recipe in front of me for “the perfect chocolate chip cookie” and you’d better believe I am going to put you to the test on that claim!

I found his recipe over at Annie’s Eats and couldn’t resist trying it out. Especially since today is apparently National Chocolate Chip Day. (I have no proof to back that up but hey, I’ll take any excuse to bake!) :o)

Perfect is a strong word, and one I don’t use lightly… but I must admit that these cookies are pretty darn close, if not perfection themselves.

Thick, chewy, and chock-full of chocolate chips… I just don’t even have enough words for how yummy these are!

Click here to see the recipe on her site. You’ll be amazed to know that I did not change one single thing in this recipe… they’re that good!

I’m pretty sure I will be using this recipe as my go-to chocolate chip cookie recipe from now on.

Oh and my favorite part of the whole recipe? The way she formed the dough for the cookies.

You take the dough, form it into a ball in your hands and then gently break the ball apart in half (like you’re cracking an egg in half!) to make two cookies. Lay the dough pieces craggly-side up on the baking sheet and bake as usual!

Sounds a little goofy, I know, but it really does make the cookies cuter! :o)

The”Perfect” Chocolate Chip Cookie Recipe

Ingredients:
2 cups + 2 tablespoons flour
1/2 teaspoon baking soda
1/2 teaspoon salt
3/4 cup butter, melted and cooled slightly (still warm)
1 cup firmly packed brown sugar
1/2 cup sugar
1 large egg
1 egg yolk
2 teaspoons pure vanilla extract
1 1/2 cups semi-sweet chocolate chips

Directions:
Preheat the oven to 325ºF. Line 3 baking sheets with parchment paper.

In a small bowl, whisk together the flour, baking soda & salt; Set aside.

In your mixer bowl, cream together the warm butter and sugars until light and fluffy, about 3-5 minutes. Beat in the egg, egg yolk & vanilla until smooth

Beat in the flour mixture until just combined and then stir in the chocolate chips.

(*At this point, if your dough is too soft to roll, place it in the fridge to chill for a while. Then proceed when the dough is nice and firm!*)

Take about 1/2 cup of the dough and form it into a ball in your hands. Hold the ball in both hands and gently break it apart (like you are cracking an egg!) and set the dough pieces craggly-side up on the baking sheet. (You now have 2 cookies from that 1/2 cup of dough).

Repeat until all the dough is gone, allowing plenty of space in between cookies on the sheets so that they have room to spread.

Bake for 12-18 minutes, depending on your oven and the size of your cookies - until the cookies are barely golden brown around the edges… being careful not to over-bake them.

Remove them from the oven, leaving the cookies on the baking sheets until they have firmed up enough to lift off the pans… around 5-10 minutes.

Enjoy as many as you want warm and freeze the leftovers!!